Retail POS Demonstration
Begin by downloading and installing the Retail program from our download page.
Then double-click on the  icon on your desktop to
start the Retail Server program.
icon on your desktop to
start the Retail Server program.
You may need to tell your firewall software that you would like the program to act as a server.
Contents
Set Up a New User
Add an Item for Sale
Enter a Sale
Print a Receipt
Reprint a Receipt
Set Up a Salesperson
Print a Sales Report
Set Up a New User
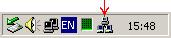
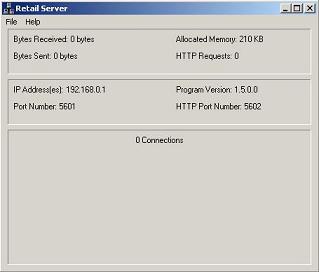
Double-click on the server icon on your system tray.
This will display the Retail Server main screen.
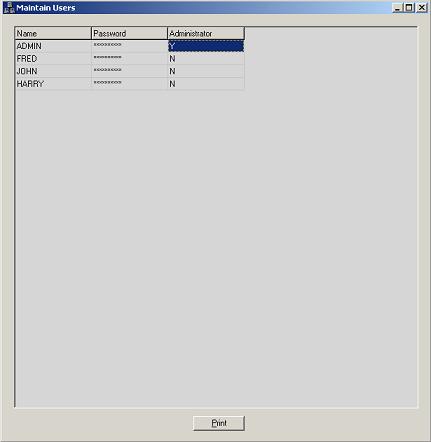
Go to the File menu and select Users.
To add a new user press the <Insert> key on your keyboard. To delete hold down
the <Ctrl> key and press <Delete>.
Enter the user's name in the Name field.
Enter a password in the Password field. (Password's are optional so this field can be left blank.)
To allow the user to maintain salespersons and payment types enter a Y in the Administrator field.
To edit the details of a user click on the field you wish to edit and then click it a second time (as distinct from a double-click.)
Add an Item for Sale
Double-click the  icon on your
desktop to start the Retail Client program.
icon on your
desktop to start the Retail Client program.
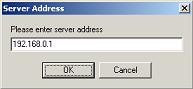
Enter the server's IP address from the Retail Server main screen.
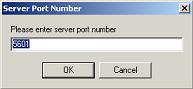
Enter the server's port number (not the HTTP port number) from the Retail Server main screen.
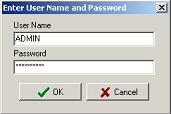
Enter the user's name and password.
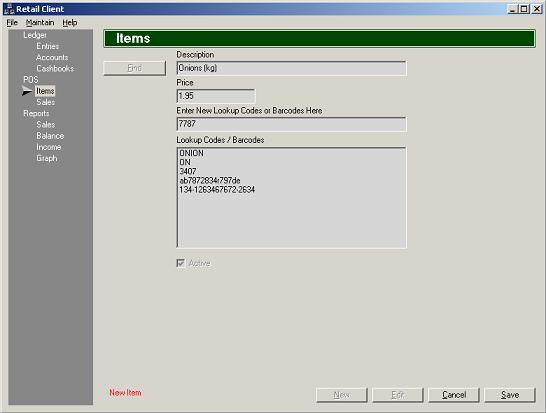
Click on Items in the dark grey navigation area on the left. This will take you to the Items screen.
To add a new item click on the New button at the bottom. The screen will switch to New Item mode. This is displayed in the bottom left corner of the screen.
Enter the item's description in the Description field at the top. Then enter the price in the Price field.
Next enter (or scan) the lookup codes and barcodes that will be used for this item in the field Enter New Lookup Codes or Barcodes Here. As codes are added they will appear in the Lookup Codes / Barcodes area below.
To delete a lookup code or barcode click on it in the Lookup Codes / Barcodes area and press the <Delete> key.
When you are finished click on the Save button to save the item to the database.
To edit an item click on the Edit button to switch the screen to Edit Mode. When you are finished click on the Save button to save the changes to the database. Click Cancel to discard any changes.
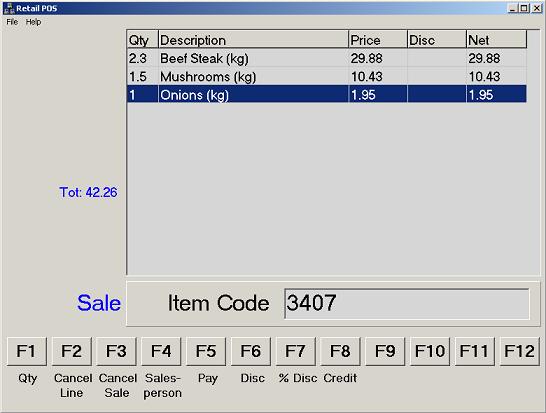
Enter a Sale
Double-click the  icon on your desktop to start
the Retail POS program.
icon on your desktop to start
the Retail POS program.
Enter the server's IP address from the Retail Server main screen.
Enter the server's port number (not the HTTP port number) from the Retail Server main screen.
Enter the user's name and password.
Enter the item code or scan the barcode for the item you wish to sell. The quantity will default to 1 but
this can be changed by pressing <F1>.
To adjust the quantity on a previous item use the up and down arrow keys to highlight the item you wish to change.
Then press <F1>.
To cancel a line press <F2>. To cancel the entire sale press <F3>.
You can optionally record a salesperson with each sale by pressing <F4> and entering the salesperson's name and password.
When you have finished press <F5> and select the payment type. Enter the payment amount or press <Enter> to confirm the default amount.
When the payment is enough to cover the value of the sale you will be asked to confirm if you wish to complete the sale.
On completion the sale will be saved to the database. However if the program is OFFLINE (with no connection to the server) the sale will be placed in a queue and saved to the database once the connection has been re-established.
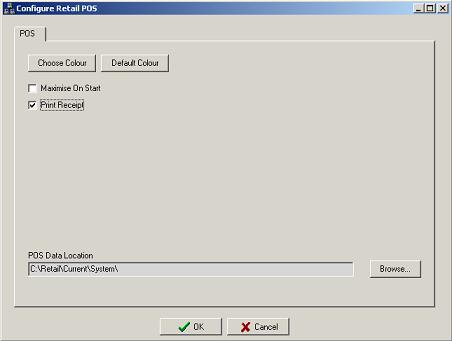
Print a Receipt
In the Retail POS program go to the File menu and select Configure. Then put a
tick in the check box next to Print Receipt. This will cause a receipt to be printed automatically on sale completion.
Reprint a Receipt
In the Retail Client program click on Sales under POS in the dark grey navigation area
on the left. This will take you to the Sales screen.
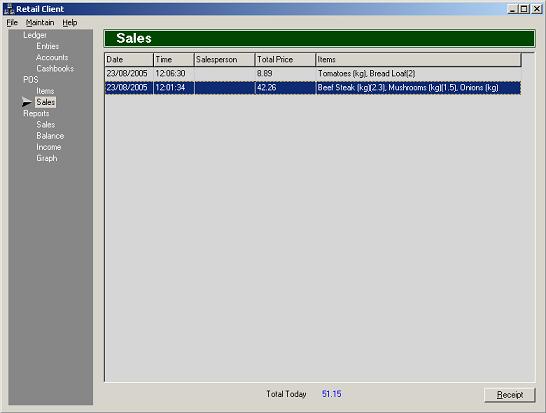
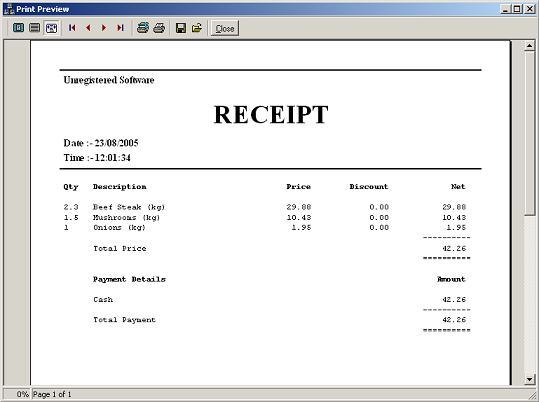
Select a sale and then click on the Receipt button or double-click it to display a preview. To print
it click on the printer icon at the top.
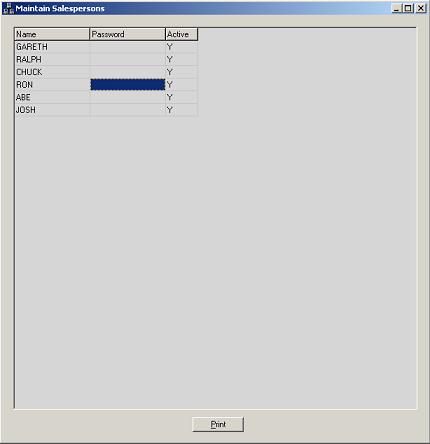
Set Up a Salesperson
In the Retail Client program go to the Maintain menu and select Salespersons.
(This menu is only visible if the user has been set up as an administrator.)
To add a new salesperson press the <Insert> key on your keyboard.
Enter the salesperson's name in the Name field.
Enter a password in the Password field. (Password's are optional so this field can be left blank.)
To edit the details of a salesperson click on the field you wish to edit and then click it a second time (as
distinct from a double-click.)
Once a salesperson has been added they cannot be deleted. However they can be disabled by
entering N in the Active field.
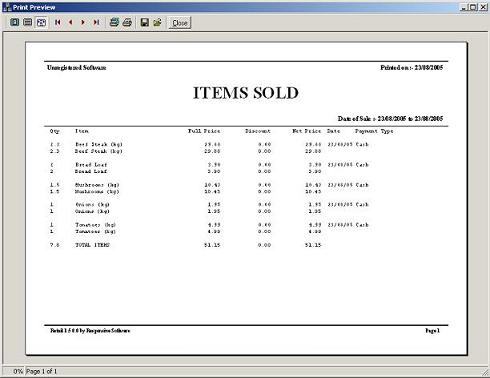
Print a Sales Report
In the Retail Client program click on Sales under Reports in the dark grey
navigation area on the left. This will take you to the Sales Report screen.
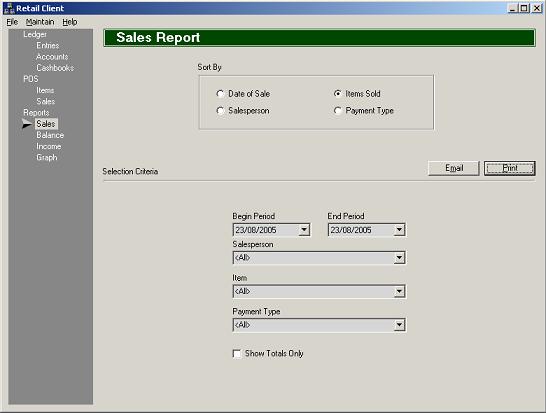
Click on the Print button to display a preview. To print it click on the printer icon at the top.