LedgerPlus Quick Start
After downloading LedgerPlus.exe double-click on the ![]() icon to start the program.
icon to start the program.
(NOTE: If nothing happens when you click the download link try the right mouse button and select Save link as from the pop-up menu.
If you get a message saying it cannot be downloaded securely click on the down-arrow and select Keep or Keep Anyway. If you still
have difficulty please see the LedgerLite FAQ page.)
The first time you run LedgerPlus the database
file LedgerPlus.LPD gets created automatically in the same folder as you've located the program. This could be on your
desktop if that's where you saved LedgerPlus. If not it's probably in your download folder.
Because the general ledger and cashbook features are exactly the same as LedgerLite
instead of repeating them here we provide you with a link back to the
LedgerLite Quick Start page.
Contents
Add a Stock Item
Add a Stock Location
Receive Items into Stock
Find a Stock Item
Add a Customer
Find a Customer
Add a Customer Account
Find a Customer Account
Configure Sales Tax
Enter a Sale
Configure the Invoice Subheading
Print an Invoice
Make an Entry in a Customer Account
Update a Customer Account
Update All Customer Accounts
Print a Customer Account Statement
View or Print a Customers Report
View or Print a Sales Report
View or Print a Payments Report
Add a Salesperson
Add a Payment Type
Enter a Sale at Point-Of-Sale (POS)
Perform a Stocktake
View or Print a Stock Report
Maintain the Asset Register
Find an Entry in an Account
Create a Taxed Entry
Create a Duplicate Entry
Update the Inventory Account
Apply Depreciation to the Asset Accounts
Create a Comparative Balance Sheet
Create a Comparative Income Statement
Create a Budget Comparative Income Statement
Purge the Ledger
Add a Stock Item
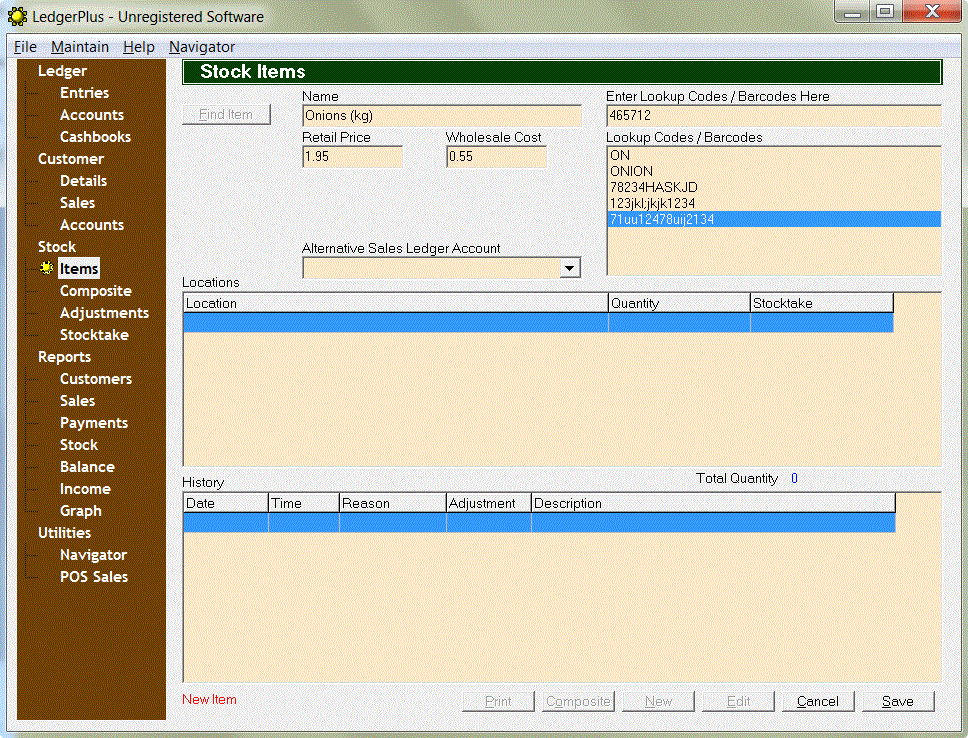
Click on Items under Stock in the brown navigation area on the left. This will take you to the Stock Items screen.
To add a new item click on the New button at the bottom. This will switch the screen to New Item mode. This is displayed in the bottom left corner of the screen.
Enter the name of the item in the Name field. Then enter the retail price of the item in the Retail Price field and
the cost in the Wholesale Cost field. (The wholesale cost is used to calculate the gross profit as it appears in the Sales Report
and also the stock value for the Stock Report and the Inventory and Cost of Sales accounts in the general ledger.)
(For non-stocked or service items you can leave the wholesale cost as zero.)
In the field labelled Enter Lookup Codes / Barcodes Here you can enter any lookup codes or scan any barcodes you want to
use when selecting the item on a sale. You can enter as
many of these as you like. As you enter each one it will appear in the Lookup Codes / Barcodes list to the right.
To remove a code from this list first select it in the list and then hold down the <Ctrl> key and press <Delete>.
If you want sales of this item to be recorded in a specific general ledger account you can select this from
the Alternative Sales Ledger Account drop-down list. Otherwise just leave this field empty and sales
of this item will be recorded in the default Sales account.
When you are finished entering the item's details click on the Save button to save the item to the database.
To edit an item click on the Edit button to switch the screen to Edit Mode. When you are finished
click on the Save button to save the changes to the database. Click Cancel to discard any changes.
NOTE: When you edit an item that has a non-zero quantity and change the Wholesale Cost no entries are automatically created
in the general ledger to reflect the change in stock value. To make the necessary adjustment you need to create an
entry either manually through the Entries screen or by running the Update Inventory Account function. See
the section Update the Inventory Account.
Add a Stock Location
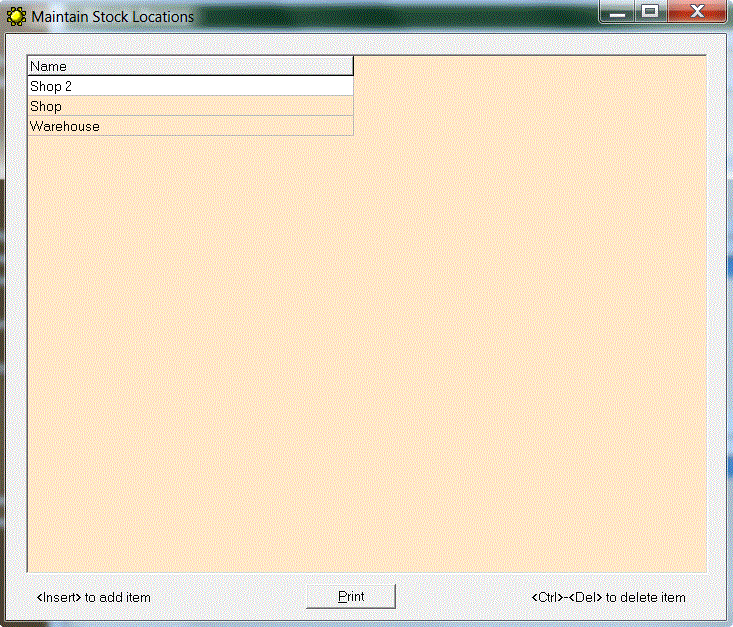
Go to the Maintain menu and select Stock Locations. To add a new stock location use the <Insert> key on your keyboard.
In the Name field enter the name of the new stock location.
To edit the name of a stock location click on the Name field and then click it a second time (as distinct from a double-click.)
Receive Items into Stock
Click on Adjustments under Stock in the brown navigation area on the left. This will take you to
the Stock Adjustments screen.
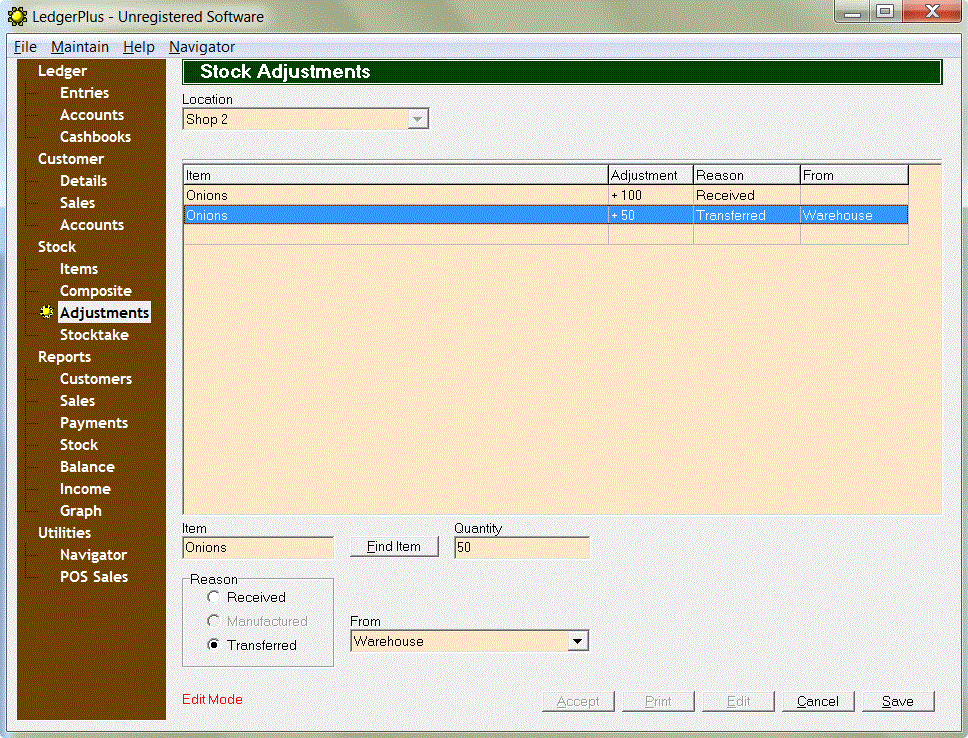
Select the location where you are receiving the new stock from the drop-down list. Then click on the Edit button
to switch the screen to New Entry mode (or Edit Mode if there are some adjustments pending.)
In the Item field enter the lookup code for the item or scan the barcode. Enter the quantity being received
in the Quantity field. Then select the Received radio button.
If the stock is being transferred from another location select the Transferred radio button and specify the
location where it came From in the drop-down list.
Press the <Enter> key to go to the next line (or click on the blank line at the bottom of the grid) and repeat the
process. When you are finished click on the Save button to save the adjustments to the database. Click Cancel to discard any changes.
Now you can print all the adjustments by clicking on the Print button. Once you have checked that
the adjustments are correct click on the Accept button to update the stock quantities.
NOTE: When you update stock quantities through the Stock Adjustments screen no entries are automatically created
in the general ledger to reflect the change in stock value. To make the necessary adjustment you need to create an
entry either manually through the Entries screen or by running the Update Inventory Account function. See
the section Update the Inventory Account.
Find a Stock Item
Click on Items under Stock in the brown navigation area on the left. This will take you to the Stock Items screen.
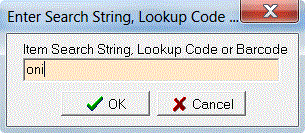
To find an item click on the Find Item button at the top. Enter the item name (or part of the name)
or a lookup code or barcode and click on OK. If there are multiple items that match your search you
will be asked to select the item from a list.
Add a Customer
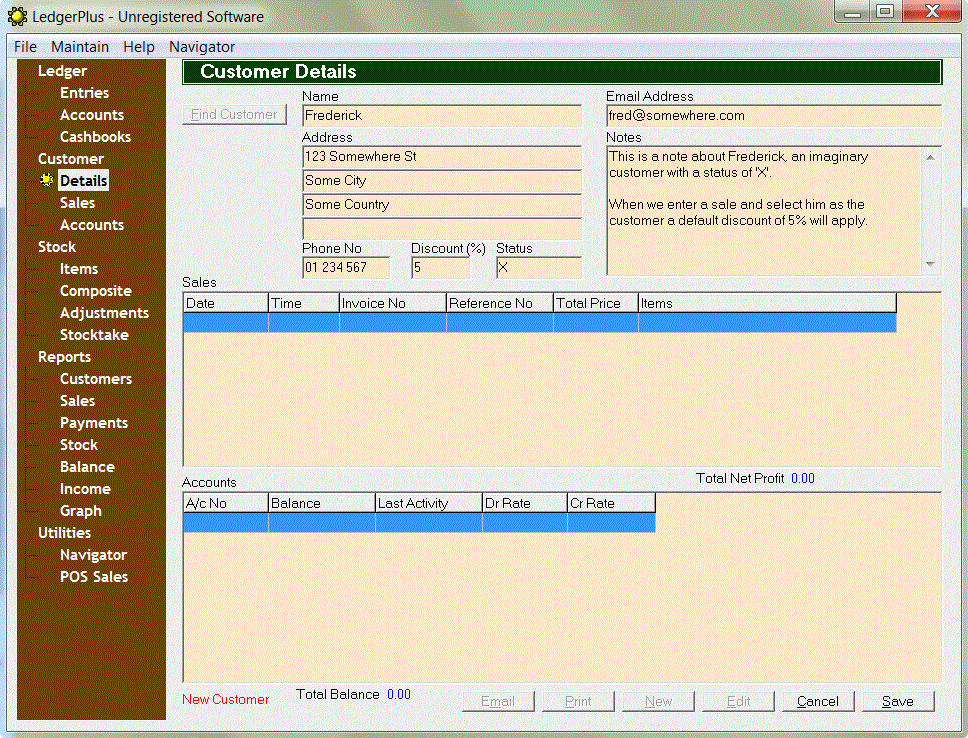
Click on Details under Customer in the brown navigation area on the left. This will take you to the Customer Details screen.
To add a new customer click on the New button at the bottom. This will switch the screen to New Customer mode. This is displayed in the bottom left corner of the screen.
In the Discount (%) field you can enter a default discount for the customer. This is optional
and even if you enter something here you can still change or remove it when entering a sale.
The Status field appears as one of the selection criteria on the Customers Report. Apart from this its
meaning is left up to you to decide. It will accept any string of characters (up to a maximum of 20.)
When you are finished entering the customer's details click on the Save button to save the customer to the database.
To edit a customer click on the Edit button to switch the screen to Edit Mode. When you are finished
click on the Save button to save the changes to the database. Click Cancel to discard any changes.
Find a Customer
Click on Details under Customer in the brown navigation area on the left. This will take you to the Customer Details screen.
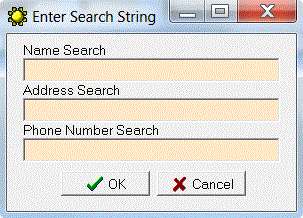
To find a customer click on the Find Customer button at the top. Enter text in the specified fields
and click on OK to select the customer from a list.
Add a Customer Account
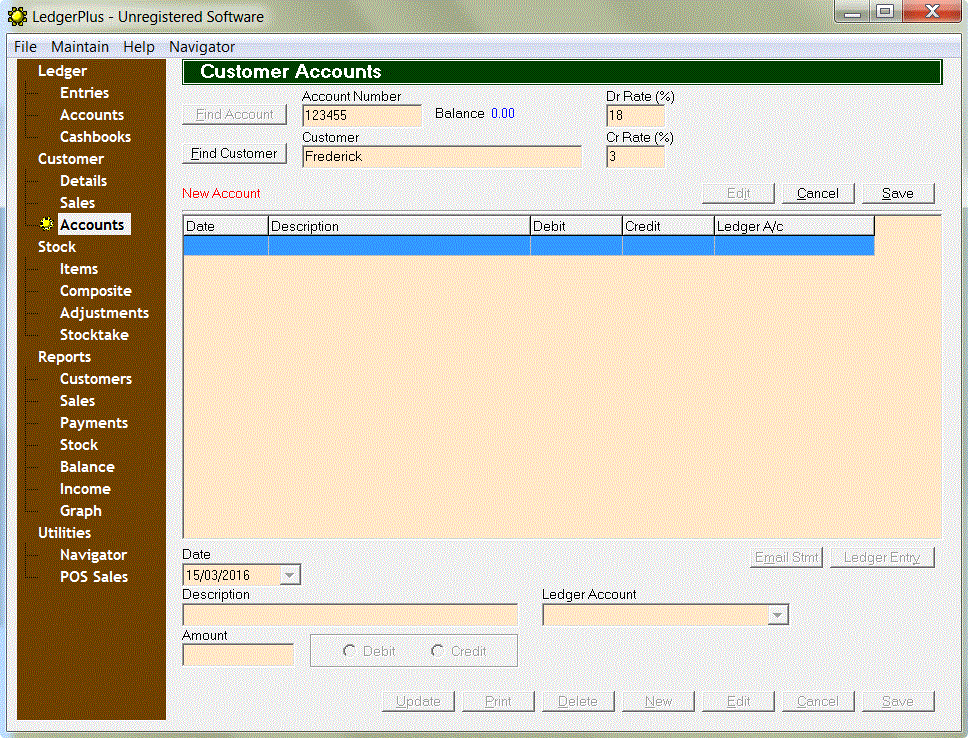
Click on Accounts under Customer in the brown navigation area on the left. This will take you to the Customer Accounts screen.
To create a new account enter a new number in the Account Number field. After confirming that you wish to create a new account the screen will switch to New Account mode.
Click on the Find Customer button next to the Customer field to search for and select the customer.
Where applicable enter the interest rate to be charged on debit balances in the Dr Rate (%) field and the interest
rate to be paid on credit balances in the Cr Rate (%) field.
When you are finished entering the customer account details click on the Save button to save the customer account to the database.
To edit a customer account click on the Edit button to switch the screen to Edit Mode. When you are finished click on the Save button to save the changes to the database. Click Cancel to discard any changes.
Find a Customer Account
Click on Accounts under Customer in the brown navigation area on the left. This will take you to the Customer Accounts screen.
Simply enter the account number into the Account Number field.
Or to find a customer account click on the Find Account button next to the Account Number field to select it from a list (in account number order.)
Configure Sales Tax
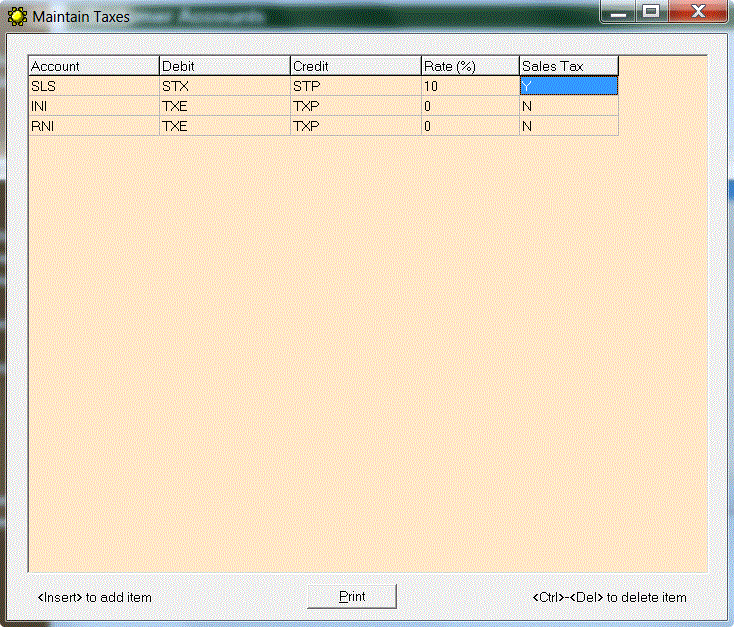
Go to the Maintain menu and select Taxes. Press the <Insert> key to create a new tax. Double-click in the
Account field and select the income account (e.g. Sales) from the list. Double-click in the Debit field and select
the expense account (e.g. Sales Tax Expense.) Double-click in the Credit field and select the liability account (e.g. Sales Tax Payable.)
Enter the tax rate as a percentage in the Rate field. Double-click in the Sales Tax field to set
to Y to indicate a sales tax.
Enter a Sale
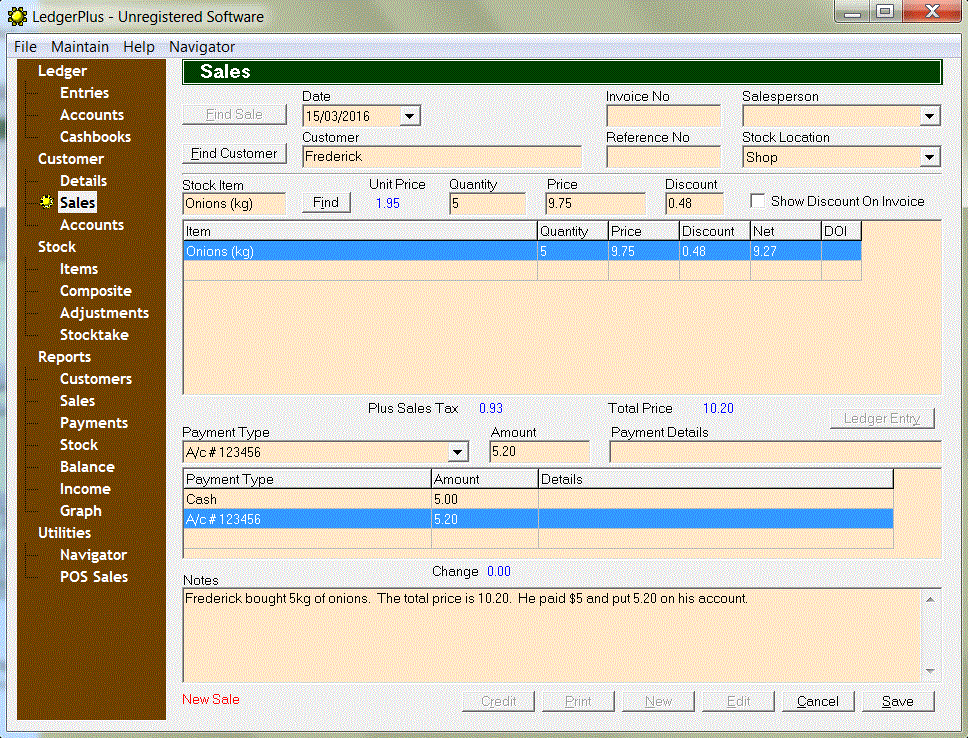
Click on Sales under Customer in the brown navigation area on the left. This will take you to the Sales screen.
To enter a new sale click on the New button at the bottom. This will switch the screen to New Sale mode. This is displayed in the bottom left corner of the screen.
The Date field defaults to the current date but you can alter this if necessary.
To select a customer click on the Find Customer button next to the Customer field or leave it
empty if for example it's a cash sale.
Enter the invoice number in the Invoice No field or leave it empty and an invoice number will be assigned
automatically when you click the Save button.
Optionally enter a reference number in the Reference No field and select a Salesperson
or a Stock Location from the drop-down lists.
In the Item field enter the lookup code for the item or scan the barcode. Enter the quantity being sold
in the Quantity field. Adjust the calculated Price and Discount fields if necessary.
If you want the customer to see the discount on the printed invoice put a tick in the Show Discount On Invoice check box.
Press the <Enter> key to go to the next line (or click on the blank line at the bottom of the grid) and repeat the
process.
Select the Payment Type from the drop-down list. The Amount of the payment will default to the
total price but you can change this if necessary. Enter any additional information (e.g. cheque or credit card numbers)
in the Details field.
Press the <Enter> key to go to the next line (or click on the blank line at the bottom of the grid) and repeat the
process.
Enter any additional information to appear on the invoice in the Notes field.
When you are finished entering the sale click on the Save button to save it to the database.
To edit a sale click on the Edit button to switch the screen to Edit Mode. When you are finished
click on the Save button to save the changes to the database. Click Cancel to discard any changes.
Configure the Invoice Subheading
Go to the File menu and select Configure. Then click on the Invoice tab. Enter
the text you wish to appear on the invoice immediately below the heading in the Invoice Subheading field.
Then click on the OK button.
Print an Invoice
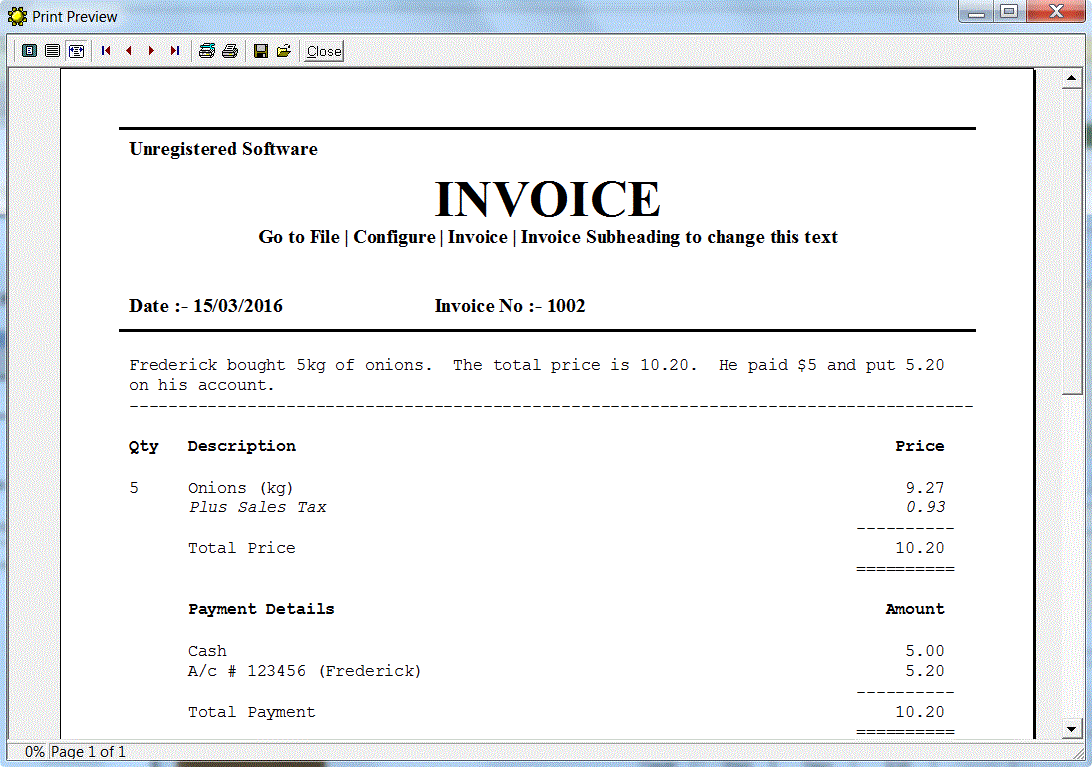
On the Sales screen after you have entered a sale and saved it click on the Print button.
Make an Entry in a Customer Account
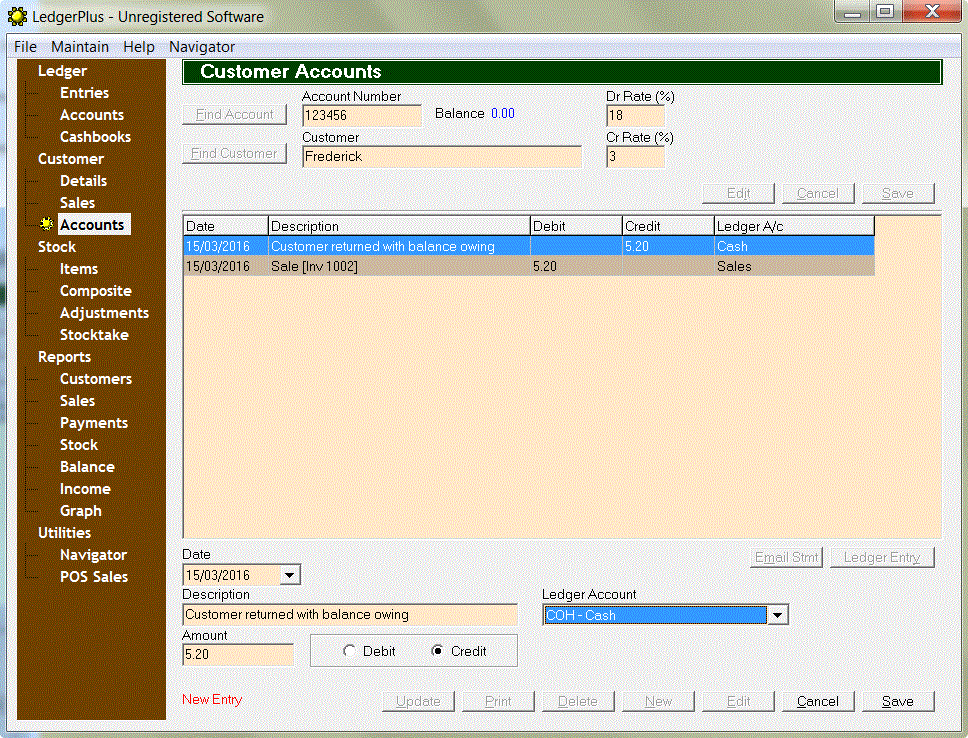
Click on Accounts under Customer in the brown navigation area on the left. This will take you to the Customer Accounts screen where you can enter the account number.
To add a new entry click on the New button at the bottom. The screen will switch to New Entry mode. This is displayed in the bottom left corner of the screen.
When you are finished entering the details click on the Save button to save the entry to the database.
To edit an entry select it in the grid and then click on the Edit button to switch the screen to Edit Mode. When you are finished click on the Save button to save the changes to the database. Click Cancel to discard any changes. Click Delete to delete the entry from the database.
Update a Customer Account
Click on Accounts under Customer in the brown navigation area on the left. This will take you to the Customer Accounts screen where you can enter the account number.
To update the account click on the Update button. This will automatically calculate and create any entries
required to bring the account up-to-date. For example if Dr Rate (%) or Cr Rate (%) have
been specified interest is charged or paid at the end of each month on the average daily balance throughout the month.
Update All Customer Accounts
To update all customer accounts in a single operation go to the Maintain menu and select Apply Interest To Customer Accounts.
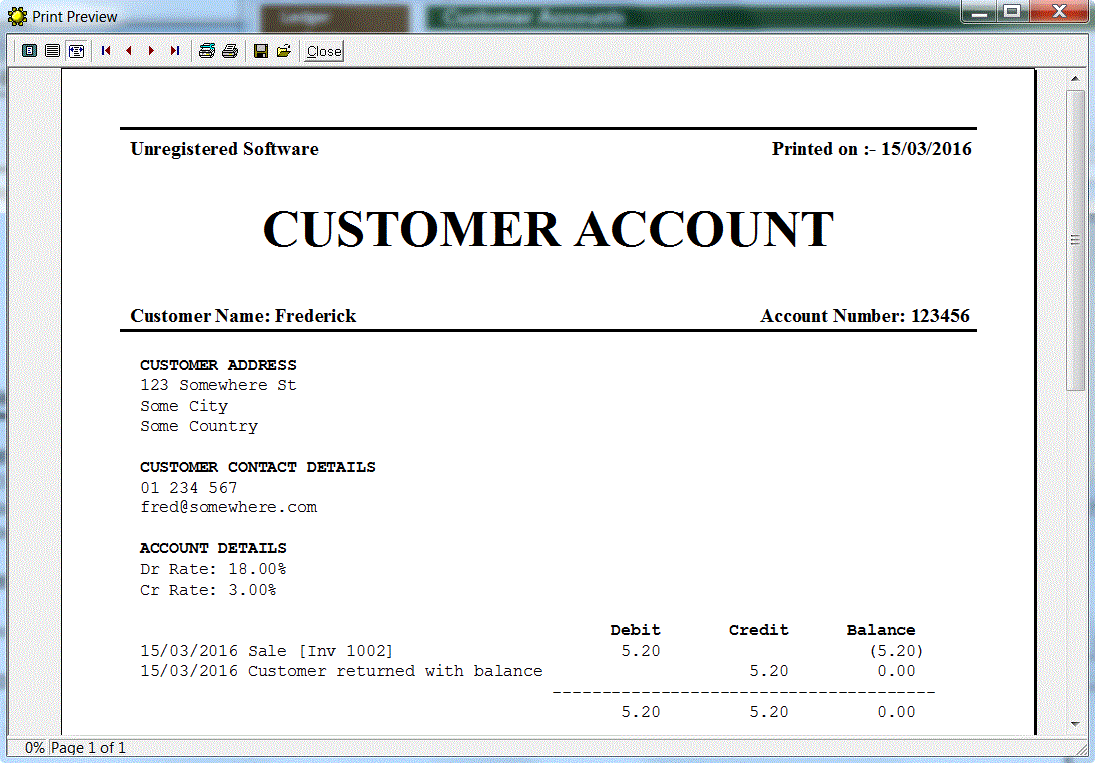
Print a Customer Account Statement
Click on Accounts under Customer in the brown navigation area on the left. This will take you to the Customer Accounts screen where you can enter the account number.
To print a statement click on the Print button.
View or Print a Customers Report
Click on Customers under Reports in the brown navigation area on the left. This will take you to the Customers Report screen.
Specify the order you would like the report to be sorted by selecting the
appropriate radio button under Sort By. Enter the selection criteria under Select By and select the items
you want to appear on the report under Show.
Click on the Print button to display a preview. To print it click on the printer icon at the top.
View or Print a Sales Report
Click on Sales under Reports in the brown navigation area on the left. This will take you to the Sales Report screen.
Specify the order you would like the report to be sorted by selecting the
appropriate radio button under Sort By. Enter the selection criteria under Select By and select the items
you want to appear on the report under Show.
Click on the Print button to display a preview. To print it click on the printer icon at the top.
View or Print a Payments Report
Click on Payments under Reports in the brown navigation area on the left. This will take you to the Payments Report screen.
Specify the order you would like the report to be sorted by selecting the
appropriate radio button under Sort By. Enter the selection criteria under Select By and select the items
you want to appear on the report under Show.
Click on the Print button to display a preview. To print it click on the printer icon at the top.
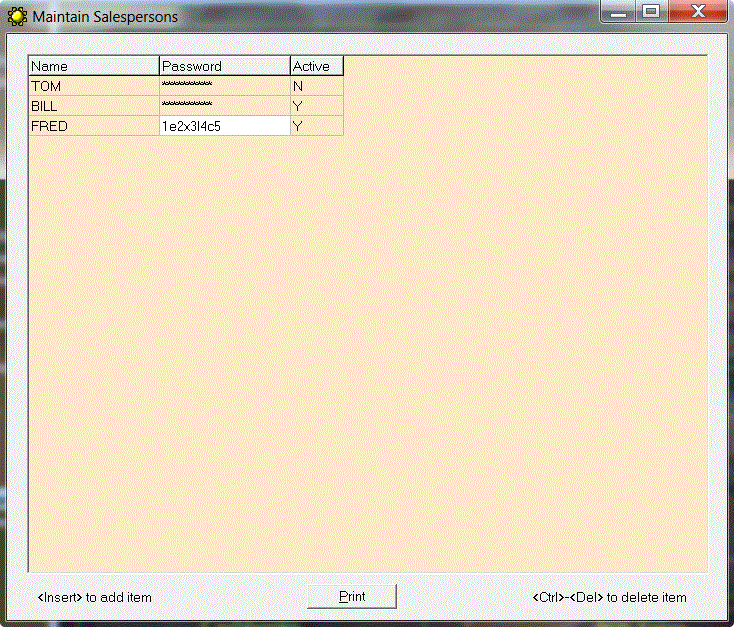
Add a Salesperson
Go to the Maintain menu and select Salespersons. To add a new salesperson use the <Insert> key on your keyboard.
In the Name field enter the name of the salesperson.
In the Password field enter the password to be used by the salesperson when entering a sale through the point-of-sale (POS).
To prevent the salesperson using the point-of-sale (POS) enter N in the Active field.
To edit the details of a salesperson click on the field you wish to edit and then click it a second time (as distinct from a double-click.)
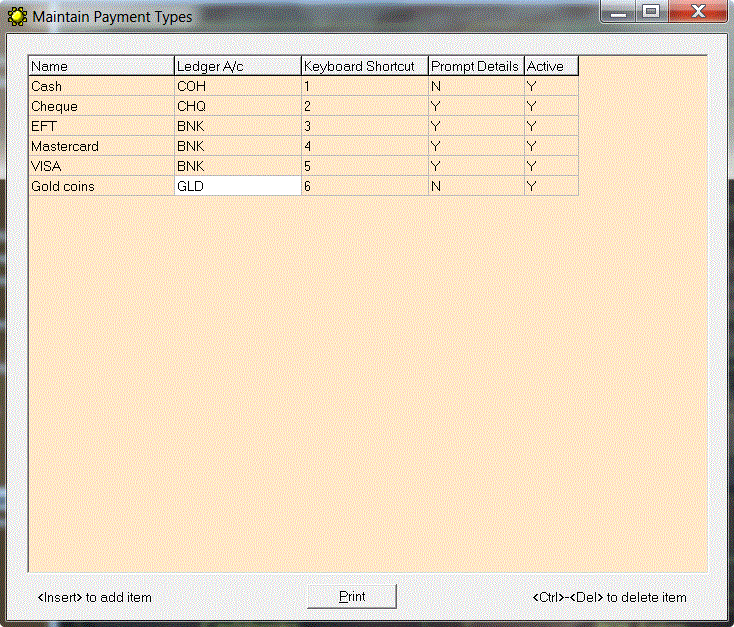
Add a Payment Type
Go to the Maintain menu and select Payment Types. To add a new payment type use the <Insert> key on your keyboard.
In the Name field enter the name of the payment type.
In the Ledger A/c field enter the abbreviation of the general ledger account you wish to associate with this payment type or double-click to select it from a list.
Enter the Keyboard Shortcut (letter or digit) you will use to select this payment type at point-of-sale (POS).
To prompt for additional details (e.g. cheque or credit card numbers) at point-of-sale enter Y in the Prompt Details field.
To prevent the payment type being used at the point-of-sale (POS) enter N in the Active field.
To edit the details of a payment type click on the field you wish to edit and then click it a second time (as distinct from a double-click.)
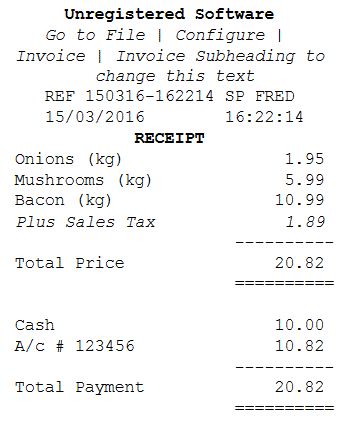
Enter a Sale at Point-Of-Sale (POS)
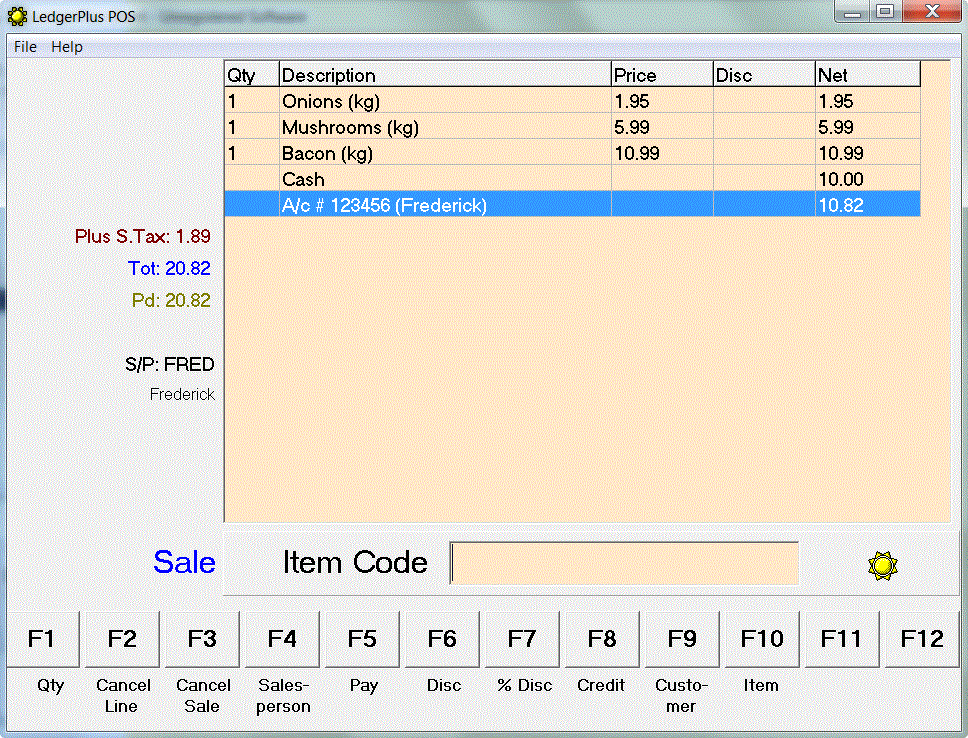
To access the point-of-sale (POS) screen configure LedgerPlus to run in a client/server configuration
and then run a point-of-sale (POS) client by using the command-line parameter /p (instead of the normal /c.)
Enter the item code or scan the barcode for the item you wish to sell. The quantity will default to 1 but this can be changed by pressing <F1>.
To adjust the quantity on a previous item use the up and down arrow keys to highlight the item you wish to change. Then press <F1>.
To cancel a line press <F2>. To cancel the entire sale press <F3>.
You can optionally record a salesperson with each sale by pressing <F4> and entering the salesperson's name and password.
You can optionally record a customer with each sale by pressing <F9> and selecting the customer in the usual way.
When you have finished press <F5> and select the payment type or the customer's account to be charged. Enter the payment
amount or press <Enter> to confirm the default amount.
When the payment is enough to cover the value of the sale you will be asked to confirm if you wish to complete the sale.
On completion a receipt will be printed on the default Windows printer and the sale will be saved to the database. However
if the program is OFFLINE (with no connection to the server) the sale will be placed in a queue and saved to the database
once the connection has been re-established.
Perform a Stocktake
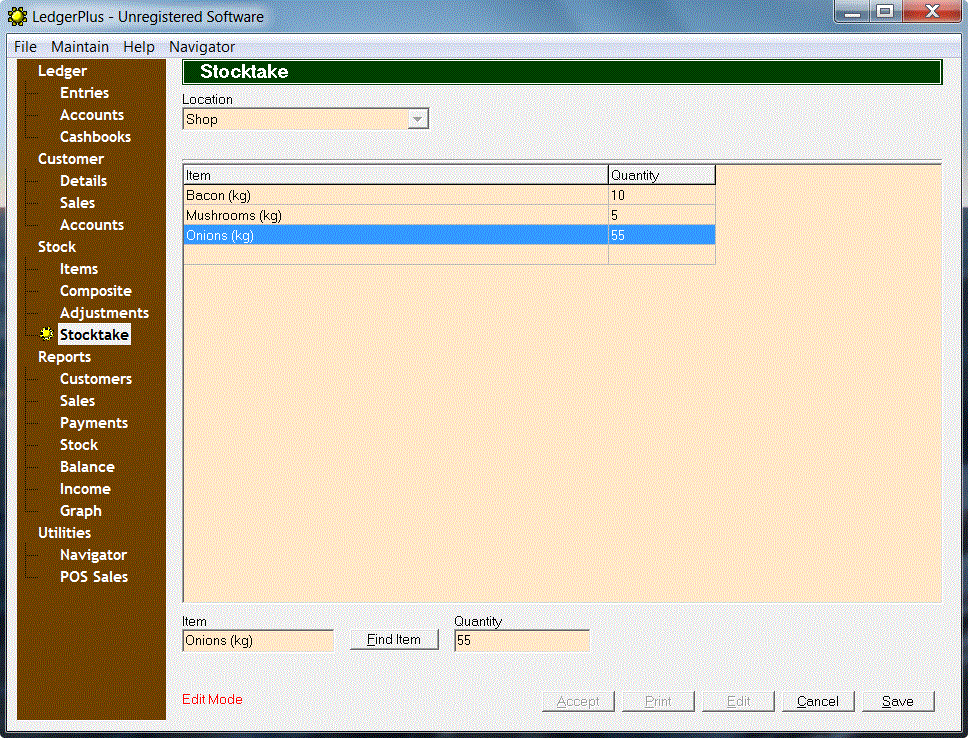
Click on Stocktake under Stock in the brown navigation area on the left. This will take you to
the Stocktake screen.
Select the location where you are performing the stocktake from the drop-down list. Then click on the Edit button
to switch the screen to New Entry mode (or Edit Mode if there are some stocktake entries pending.)
In the Item field enter the lookup code for the item or scan the barcode. Enter the stock quantity
in the Quantity field.
Press the <Enter> key to go to the next line (or click on the blank line at the bottom of the grid) and repeat the
process. When you are finished click on the Save button to save the stocktake entries to the database. Click Cancel to discard any changes.
Now you can print all the stocktake entries by clicking on the Print button. Once you have checked that
the entries are correct click on the Accept button to update the stock quantities.
NOTE: When you update stock quantities through the Stocktake screen no entries are automatically created
in the general ledger to reflect the change in stock value. To make the necessary adjustment you need to create an
entry either manually through the Entries screen or by running the Update Inventory Account function. See
the section Update the Inventory Account.
View or Print a Stock Report
Click on Stock under Reports in the brown navigation area on the left. This will take you to the Stock Report screen.
Specify the order you would like the report to be sorted by selecting the
appropriate radio button under Sort By. Enter the selection criteria under Select By and select the items
you want to appear on the report under Show.
Click on the Print button to display a preview. To print it click on the printer icon at the top.
Maintain the Asset Register
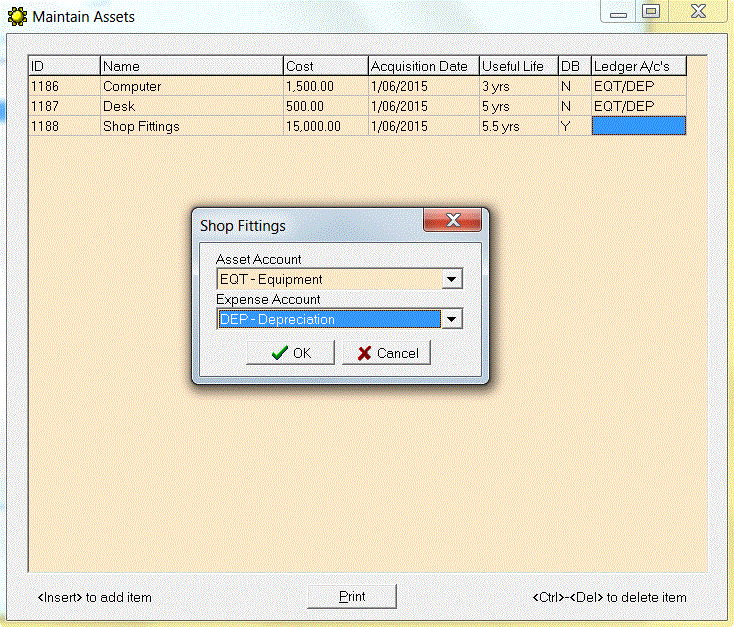
Go to the Maintain menu and select Assets. To add a new asset use the <Insert> key on your keyboard.
Enter the Name of the asset together with its Cost and Acquisition Date.
In the Useful Life field enter the number of years over which the asset is to be depreciated. To use the
double-declining-balance method enter Y in the DB field. (The default depreciation method
is straight-line.)
To specify the general ledger accounts used for depreciating the asset double-click in the Ledger A/c's field
and select the Asset Account and Expense Account before clicking on the OK button.
To edit the details of an asset click on the field you wish to edit and then click it a second time (as distinct from a double-click.)
NOTE: When you add or edit an asset in the asset register no entries are automatically created in the general ledger. To
record the assets in the general ledger you need to manually create the required entries through the Entries screen.
However depreciation entries will be created automatically in the general ledger when you run the Depreciate Asset Accounts function.
See the section Apply Depreciation to the Asset Accounts.
Find an Entry in an Account
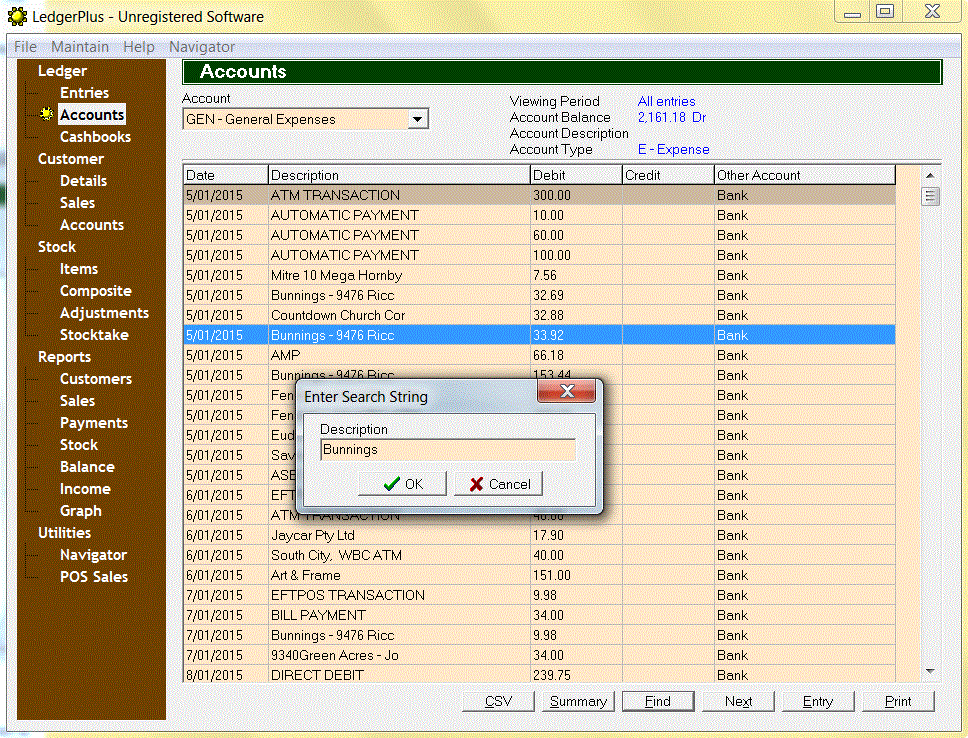
Click on Accounts under Ledger in the brown navigation area on the left. This will take you to the Accounts screen.
Select the account you wish to view from the drop-down list. The entries for the selected account appear in the grid.
To find an entry click on the Find button and enter the text in the Description field.
To continue searching click on the Next button.
Create a Taxed Entry
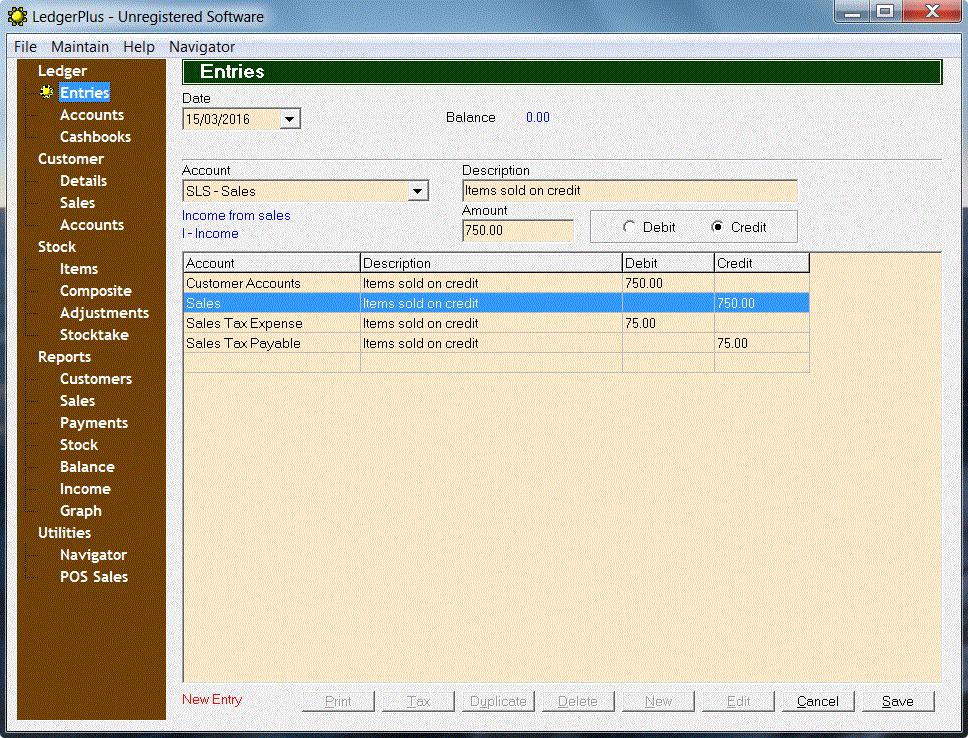
On the Entries screen before posting an entry simply click on the Tax
button. (Note that this button is only
enabled when an automatic tax calculation has been specified for one of the entry's accounts.)
Create a Duplicate Entry
On the Entries screen simply click on the Duplicate button while an entry
is visible. This will automatically create a duplicate entry and switch the screen to
New Entry mode.
Update the Inventory Account
To update the inventory account go to the Maintain menu and select Update Inventory Account. This function will
calculate the total value of all stock items based on their current quantities and wholesale costs. It will then post
an entry to the Inventory and Inventory Adjustment accounts in the general ledger. You can
then edit this entry and adjust it as necessary.
This function ensures that the balance of the Inventory account is kept consistent with the actual stock value as
it is calculated by the Stock Report. There are three specific reasons why these may not agree.
1. Stock receipts entered in the Stock Adjustments screen.
2. Adjustments to quantities made through the Stocktake screen (i.e. shrinkage.)
3. Changes to the Wholesale Cost of an item in the Stock Items screen.
It is a good idea to perform this function after any of these events and edit the resulting general ledger entry as appropriate.
Apply Depreciation to the Asset Accounts
To apply depreciation to the assets specified in the asset register go to the Maintain menu
and select Depreciate Asset Accounts. This function will automatically create entries in the general ledger
to depreciate the asset accounts at the end of each month following the acquisition date through until
the current date.
Create a Comparative Balance Sheet
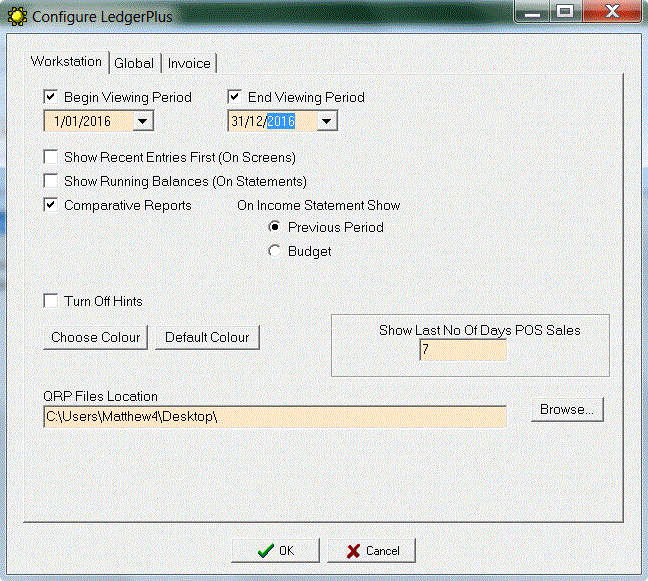
Go to the File menu and select Configure. Then click on the Workstation tab.
Put ticks in the Comparative Reports, Begin Viewing Period and End Viewing Period check boxes. In the Begin Viewing Period
field select the day after the first date you wish to show on the balance sheet. In the End Viewing Period field
select the second date.
Then click on the OK button.
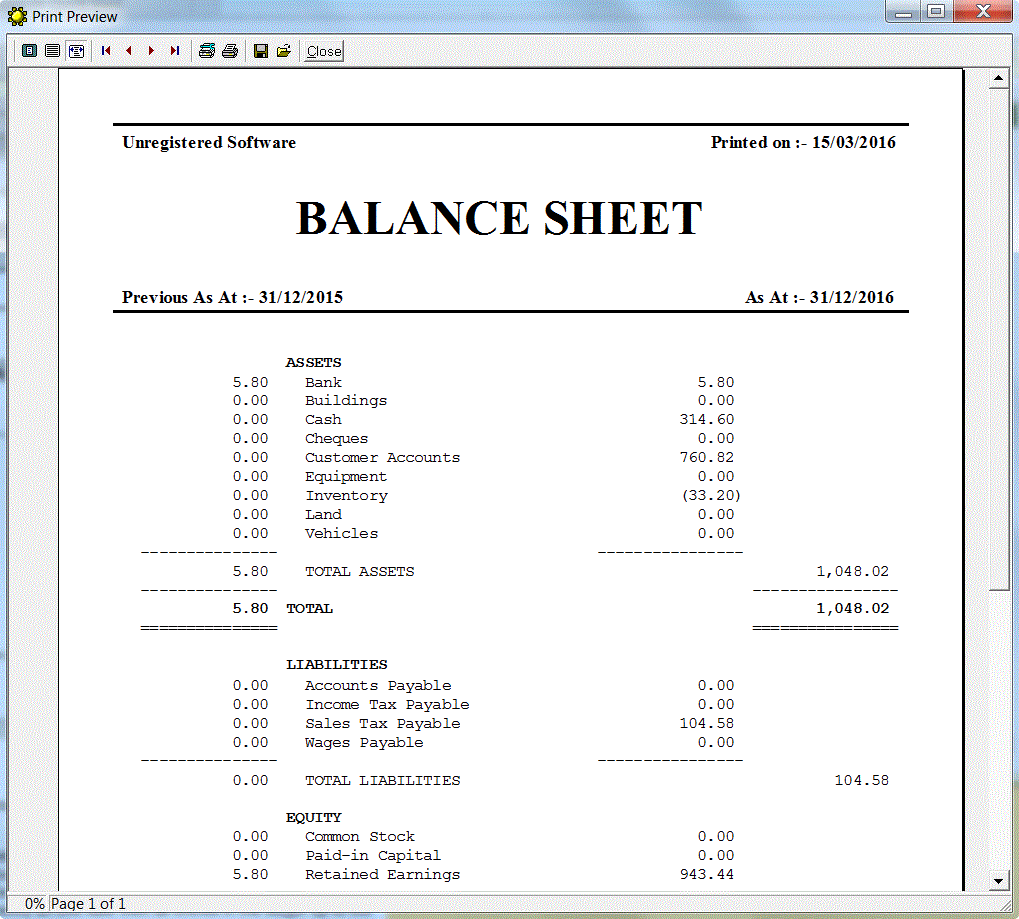
Then view or print the balance sheet to see the comparative amounts.
Create a Comparative Income Statement
Go to the File menu and select Configure. Then click on the Workstation tab.
Put ticks in the Comparative Reports, Begin Viewing Period and End Viewing Period check boxes and select the Previous Period radio
button. In the Begin Viewing Period field select the first date of the second period you wish to show on the income statement. In
the End Viewing Period field select the last date of the second period.
Then click on the OK button.

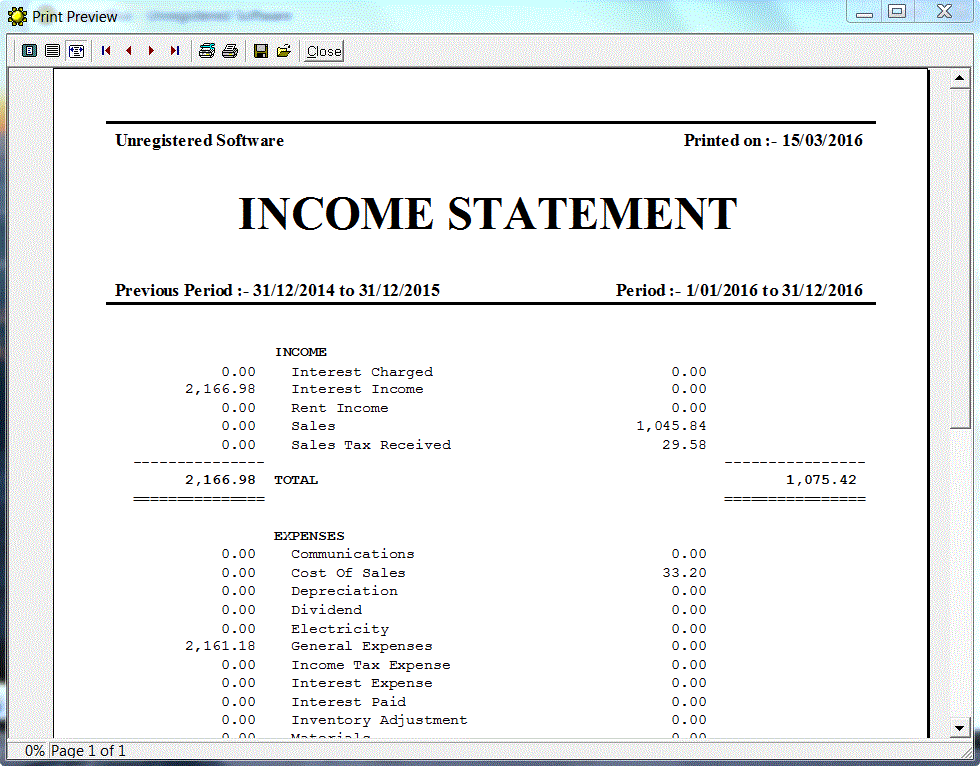
Then view or print the income statement to see the comparative amounts. (Note that the first period is always
the one immediately preceding the second period with the same number of days. This may cause some
unexpected start dates when periods include leap years or months that vary in length.)
Create a Budget Comparative Income Statement
Go to the Maintain menu and select Accounts. For each of the income and expense accounts (types I and E)
enter the Annual Budget amount.
Go to the File menu and select Configure. Then click on the Workstation tab.
Put ticks in the Comparative Reports, Begin Viewing Period and End Viewing Period check boxes and select the Budget radio
button. Then click on the OK button.
Then view or print the income statement to see the comparative amounts. (The annual budget amounts are automatically
adjusted to the length of the period chosen for the report.)
Purge the Ledger
IMPORTANT: BEFORE DOING THIS MAKE SURE YOUR DATABASE IS BACKED UP!
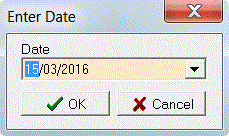
Go to the Maintain menu and select Purge Ledger. Then enter the cutoff Date and
carefully follow the prompts.
